

MCP in Claude and Codex
Connect CODEXIS AI Agent to Claude Code, Claude Desktop, Cowork and Codex over HTTP or local stdio.
Choose the application you want to use with CODEXIS AI Agent. A hosted MCP connection requires the server’s HTTPS address and your API key. Local stdio also requires an available codexis-agent-cli executable.
How the connection works
With HTTP, your application calls the hosted MCP server, which calls REST API v2. CODEXIS AI Agent processes the task in the cloud. The MCP server operator installs our CLI. With stdio, your application starts the MCP server on your computer; the agent still runs remotely.
The hosted server receives your key in the X-Api-Key header. Claude Code configures headers through headers; Codex uses http_headers or env_http_headers. The key identifies the CODEXIS AI Agent account whose data and credits are used.
The configurations below use the hosted MCP address https://vm.codexis.ai/mcp. The REST API address https://vm.codexis.ai is used between the MCP server and the agent.
ChatGPT and Codex
ChatGPT desktop application
Open Plugins in Settings. Choose Add MCP server from the Add menu.
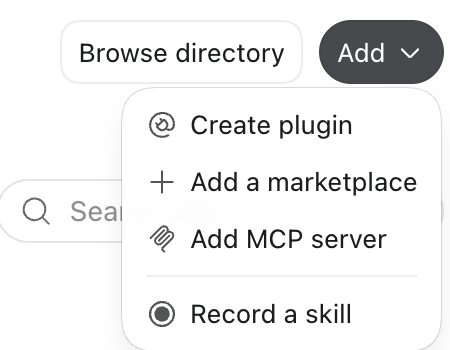
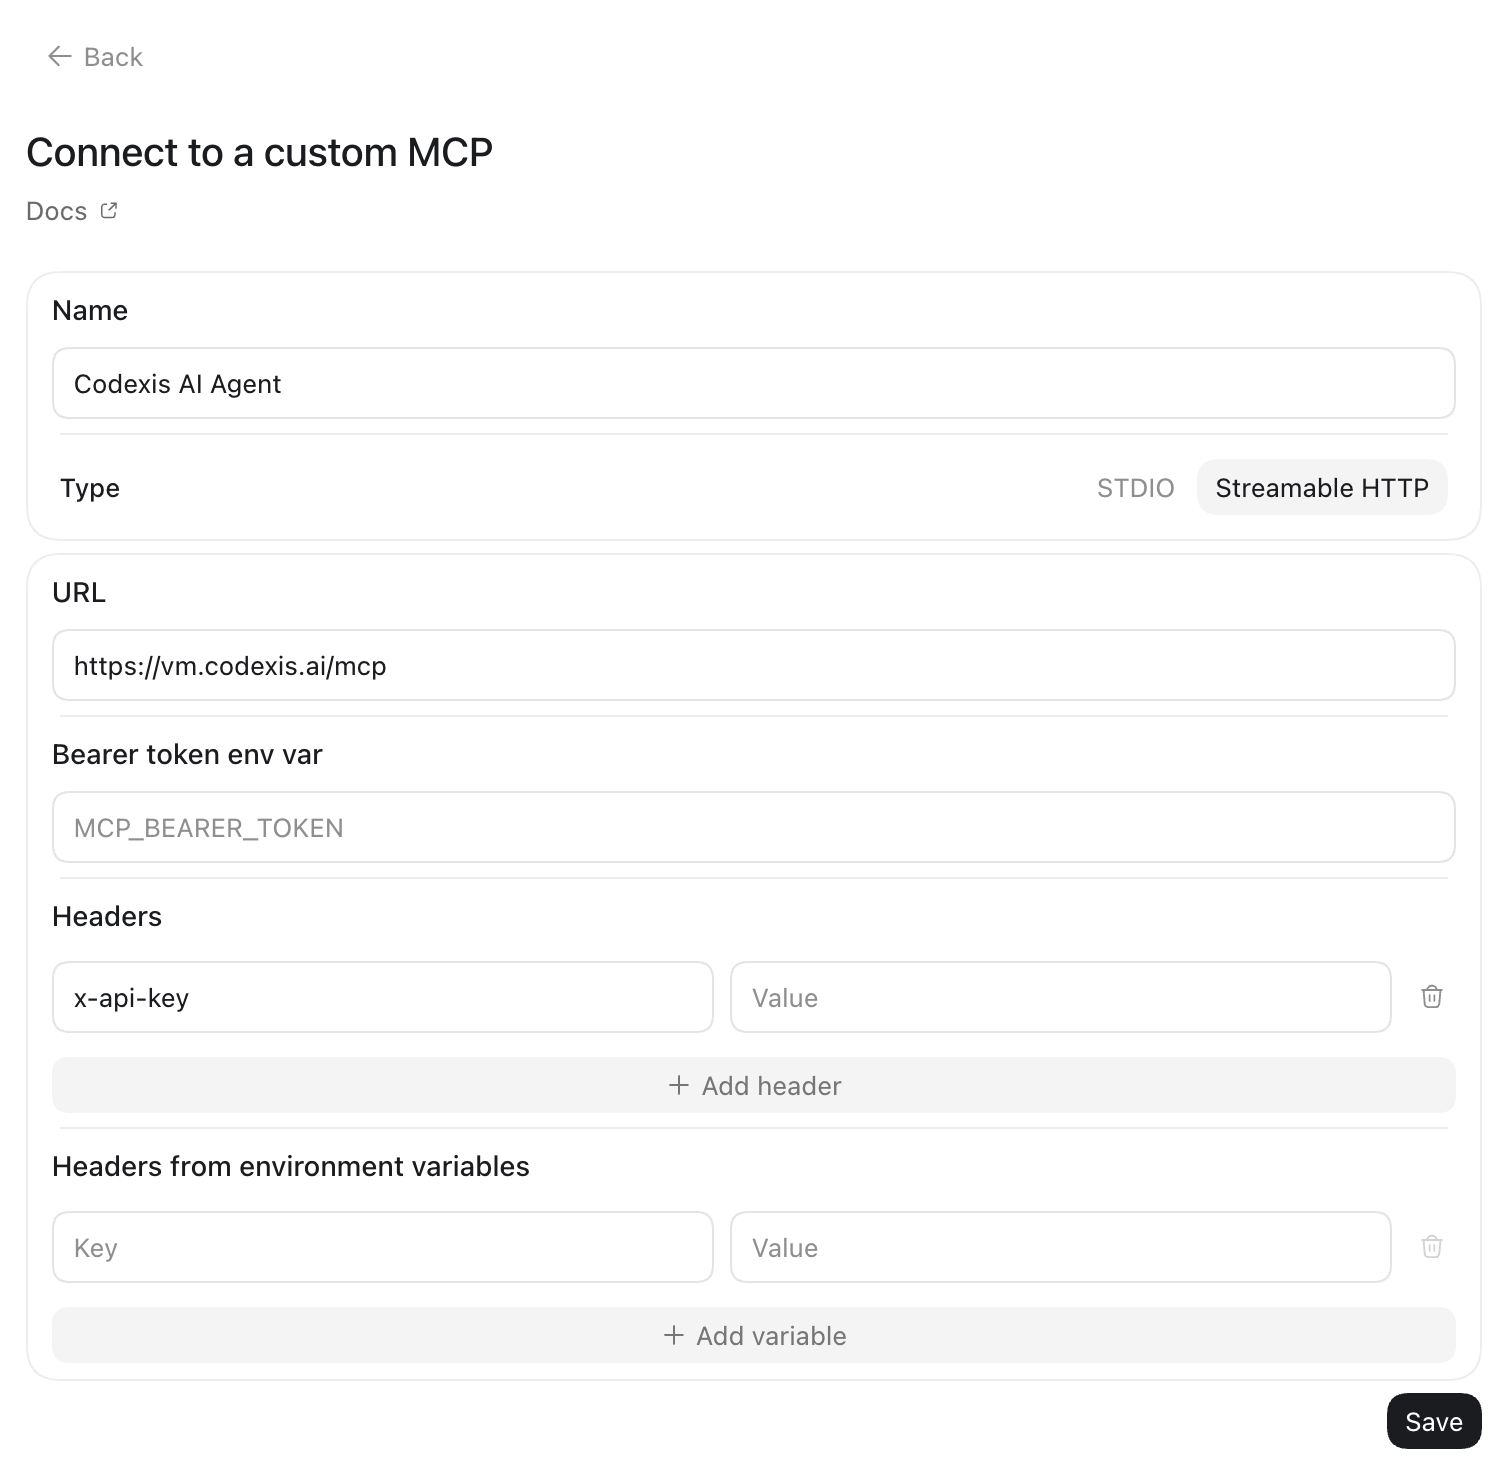
In Connect to a custom MCP, enter the following settings:
- Enter CODEXIS AI Agent in Name.
- Select Streamable HTTP in Type.
- Paste the server address below into URL.
- Under Headers, add
x-api-keyand enter your CODEXIS API key in Value. Leave Bearer token env var empty.
https://vm.codexis.ai/mcpEnter your key only in the application. Click Save, then follow the connection check below.
Configure Codex in a file
Configure Codex for local work through ~/.codex/config.toml on the machine where it runs. Add this section to your existing file and replace the example key. Keep the file containing your key out of Git.
[mcp_servers.codexis]
url = "https://vm.codexis.ai/mcp"
http_headers = { "X-Api-Key" = "api-VAS_KLIC" }
If you supply the key through an environment variable, replace the http_headers line with the following setting. The value on the right is the variable’s name; it must be available to the Codex or desktop application process at startup. Exporting it in a separate terminal does not update an already running desktop application.
env_http_headers = { "X-Api-Key" = "CODEXIS_AGENT_API_KEY" }Start a new session and check that the server is registered. In the conversation, /mcp shows connection status and available tools.
codex mcp listThis setup authenticates with an API key. The codex mcp login command is for OAuth servers. See the official OpenAI documentation for the configuration format.
Claude Code
Add .mcp.json to your project root, or merge the codexis entry into your existing server configuration. Set CODEXIS_AGENT_API_KEY in the environment that launches Claude Code.
{
  "mcpServers": {
    "codexis": {
      "type": "http",
      "url": "https://vm.codexis.ai/mcp",
      "headers": {
        "X-Api-Key": "${CODEXIS_AGENT_API_KEY}"
      }
    }
  }
}
After starting Claude Code, approve use of the project’s MCP server. Use /mcp to check the connection and tools. You can also list the configuration from the terminal.
claude mcp listThe Claude Code documentation covers project configuration and reading headers from environment variables.
Claude web, Claude Desktop and Cowork
These applications share remote connectors linked to your Claude account. The MCP connection originates from Anthropic’s infrastructure, so the server must be reachable from the internet. Use a local server address with the local clients described in the other sections.
API key authentication availability
This setup requires the Request headers section in the connector dialog. Anthropic offers it in beta to selected organizations. Check availability for your account using the header authentication documentation.
Open the wizard in Claude Desktop
Open Customize in the sidebar, select Connectors, then choose Add custom connector from the Add menu. The screenshots show the English Claude Desktop interface.
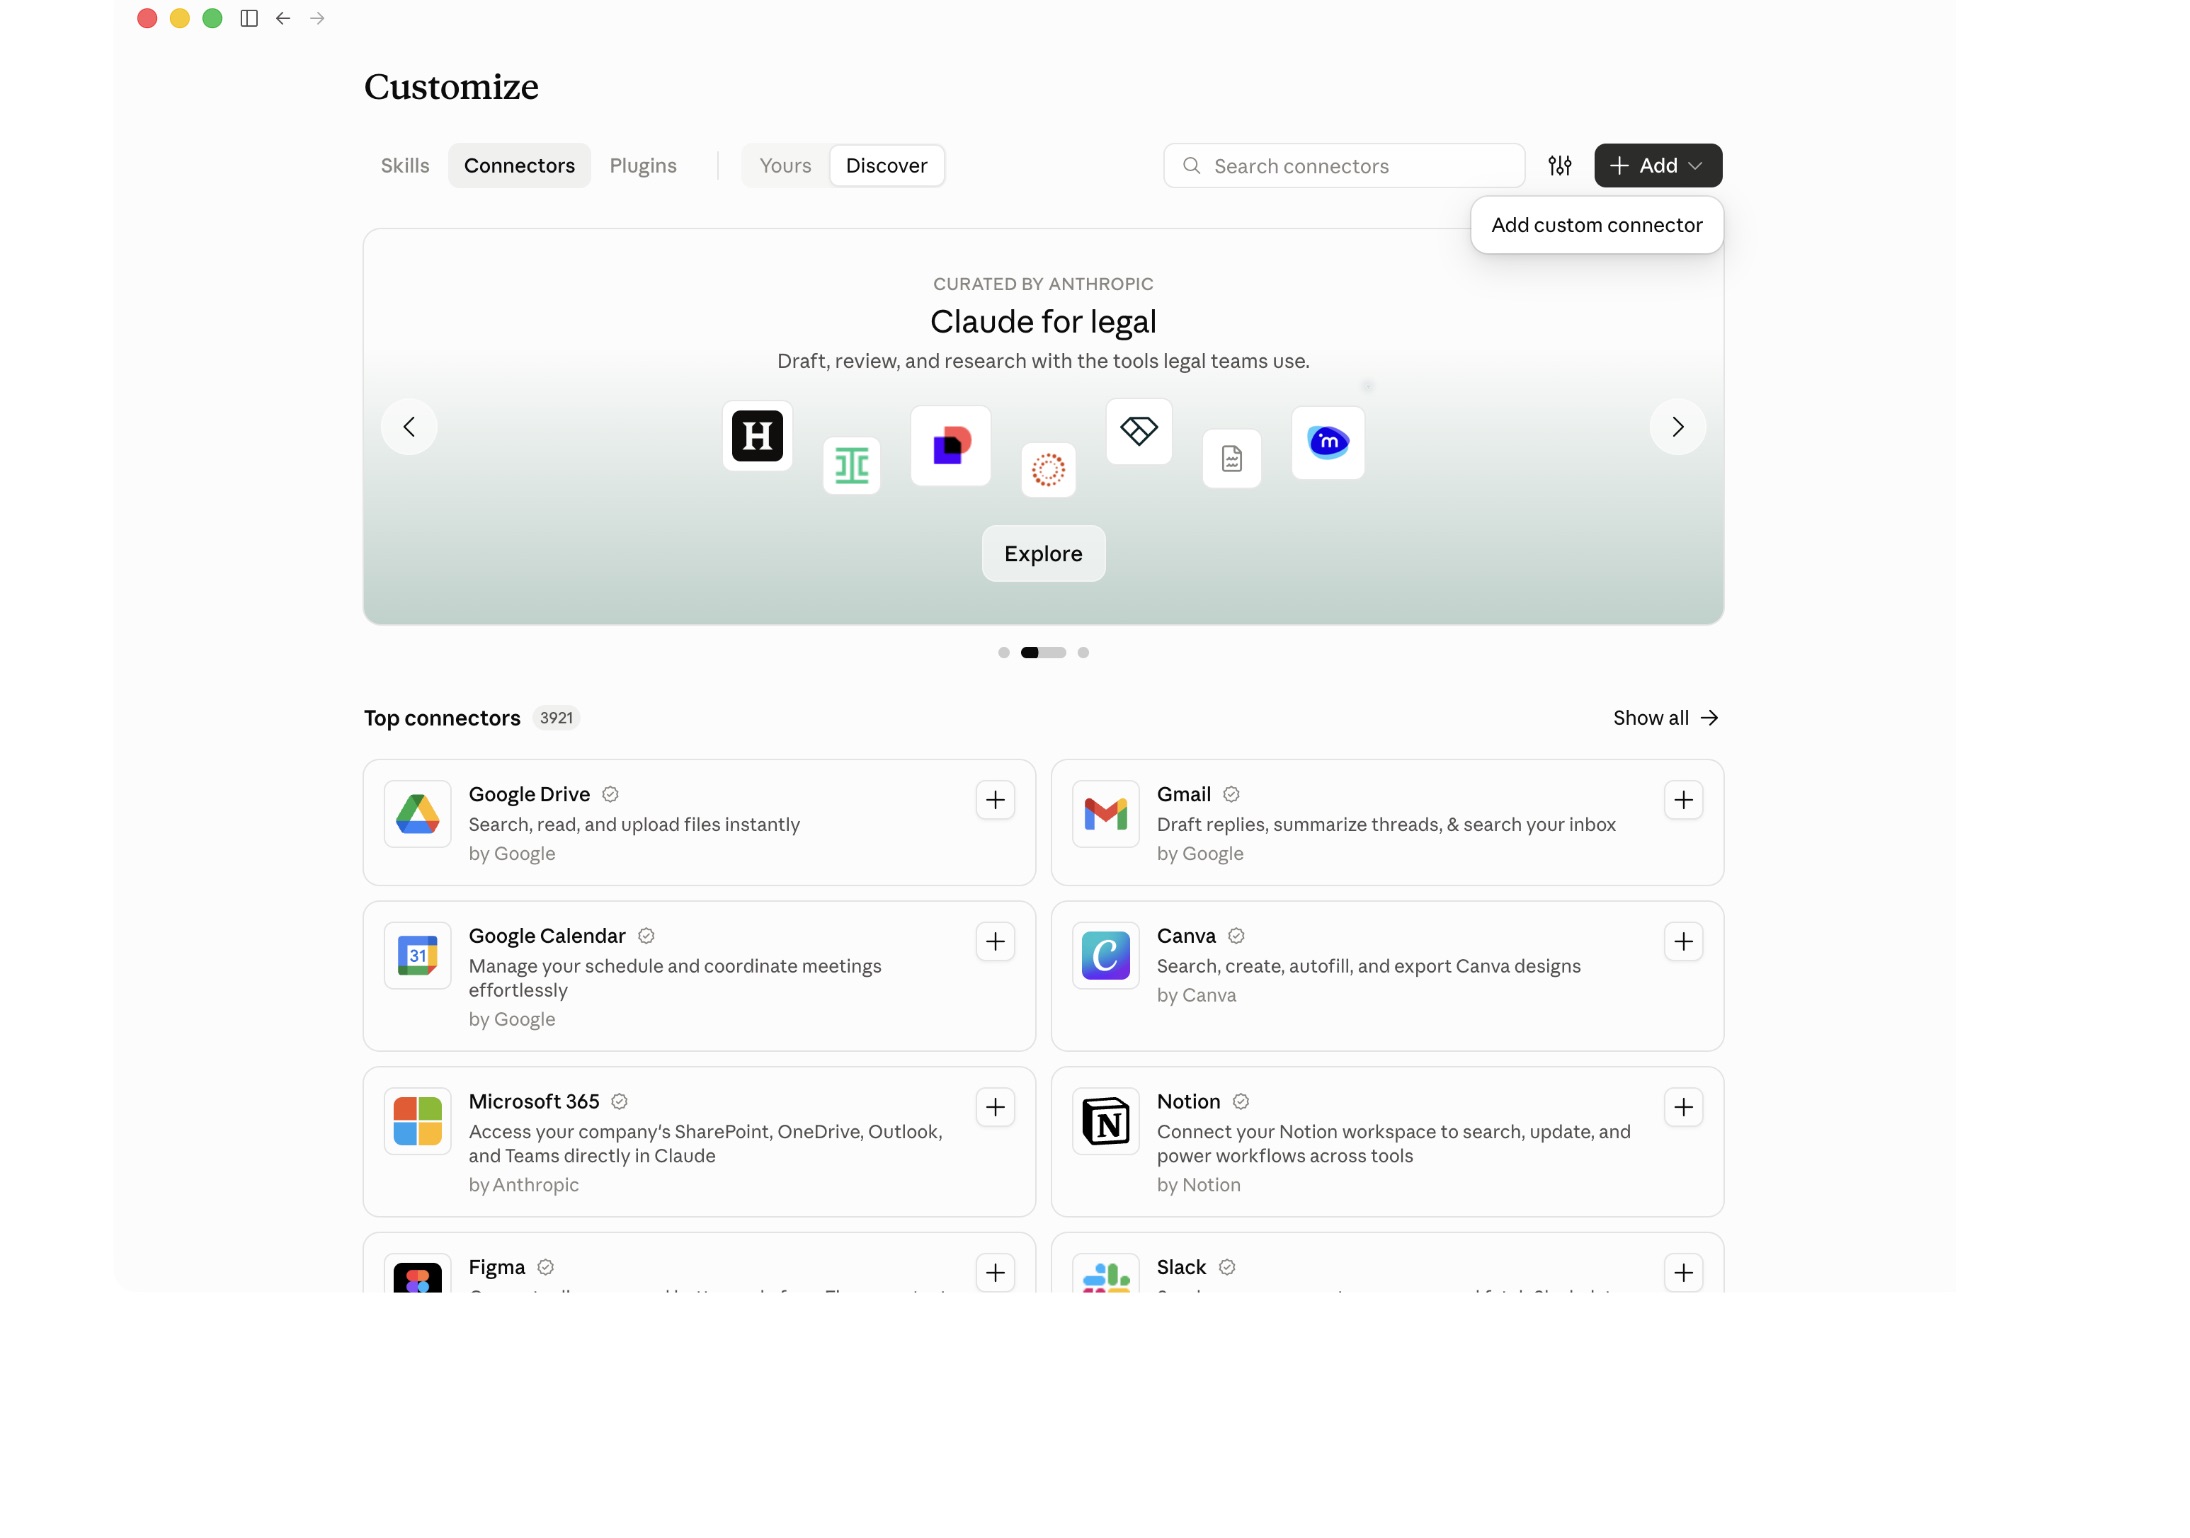
Enter the name and address
Enter CODEXIS AI Agent in Name. Paste this address into MCP server URL:
https://vm.codexis.ai/mcp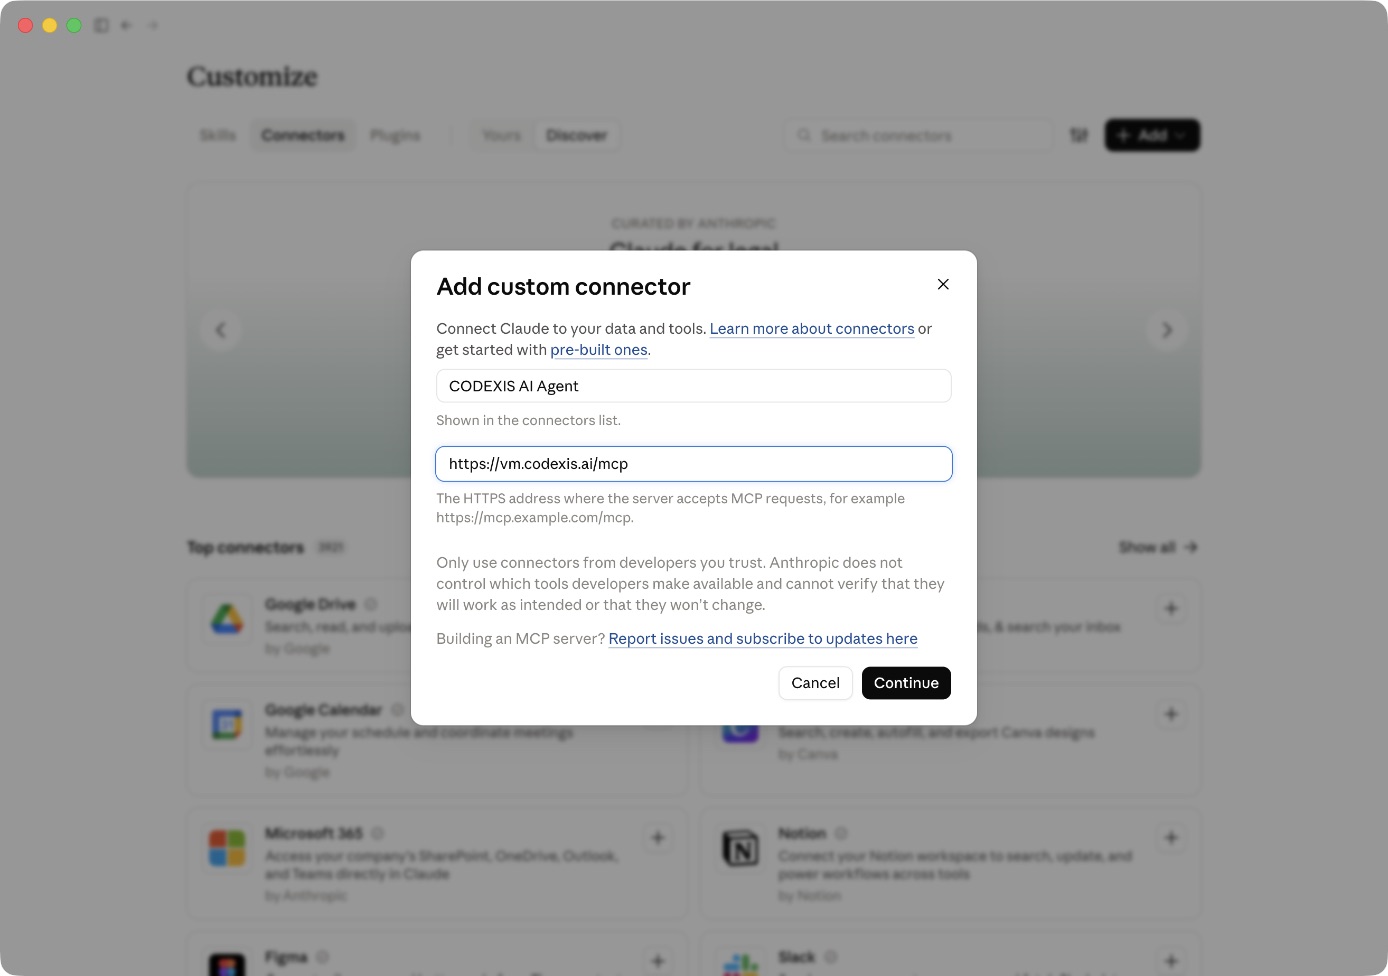
Click Continue. If Claude offers manual authentication setup, select Continue anyway and configure authentication in the next step.
Add your API key
- Under Authentication, select No sign-in. CODEXIS will authenticate requests using the API key in the header.
- Under Request headers, click Add header and select x-api-key in Header name.
- Paste your CODEXIS API key into Value and leave Required enabled.
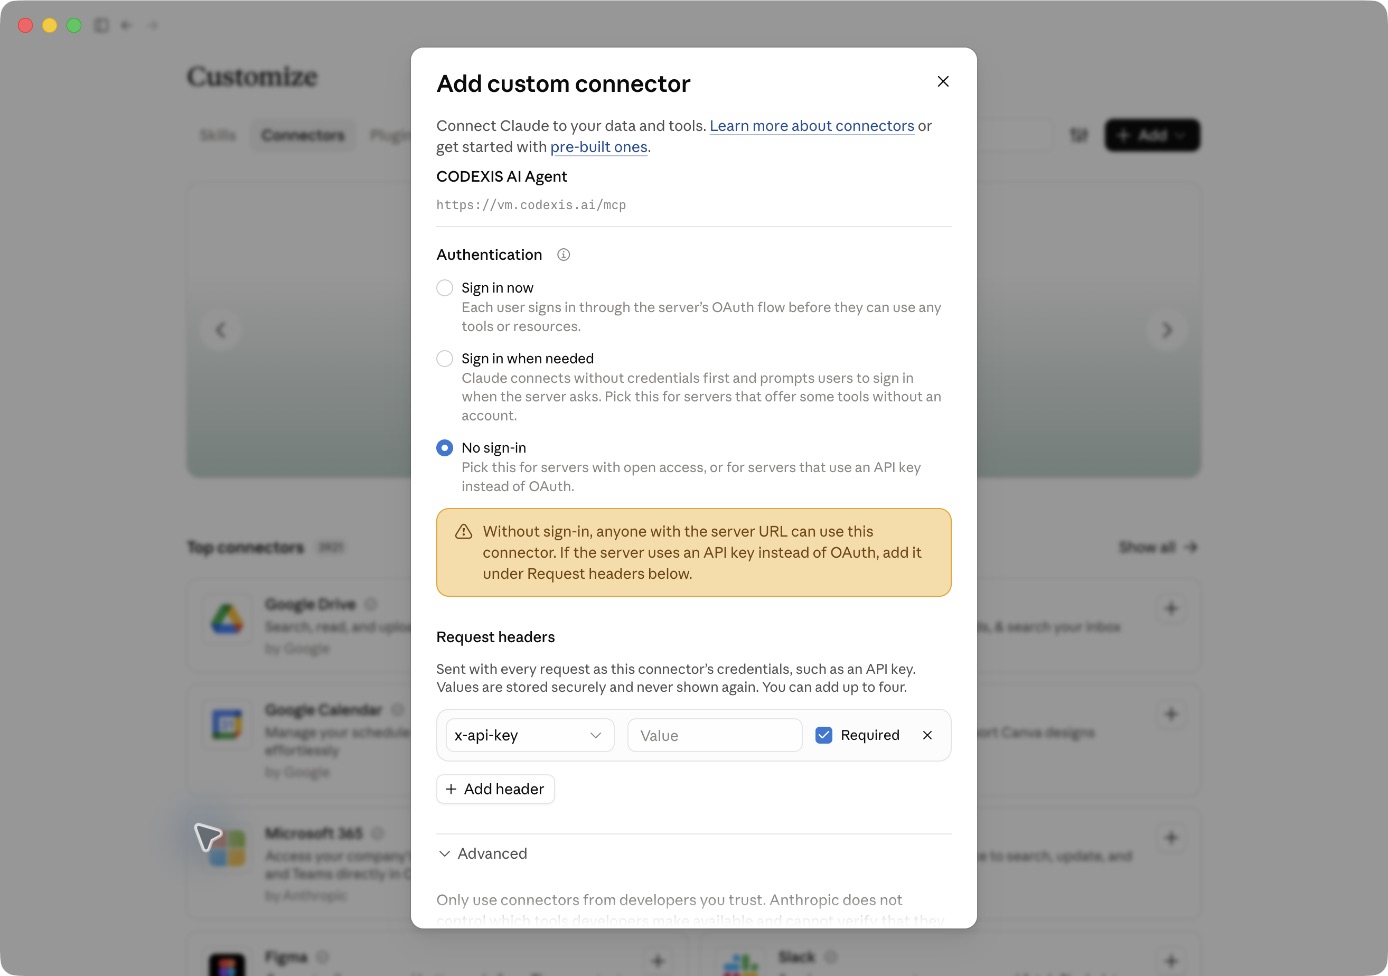
The Value field is empty in the screenshot. Enter your key only in the application, then save the connector using Add at the bottom of the dialog. See Claude’s custom connector guide for details.
On a personal account, manage the connector under Customize → Connectors. For an organization, its owner controls availability. A key stored in a shared connector gives everyone using it access to the same CODEXIS account and credits. Choose the sharing scope to match the account whose key you add.
Enable the saved connector for the conversation or Cowork task. See the Claude connector overview for availability across applications.
Local stdio for Codex and Claude Code
Use stdio to run the MCP process locally, for example to attach files from an allowed local folder. Prepare the CLI and sign in to its profile. The following command reads the key through a hidden prompt.
codexis-agent-cli auth login --endpoint https://vm.codexis.aiIn Codex, use this configuration instead of the HTTP section. The executable must be available in the client’s environment; for desktop use, you can specify its full path.
[mcp_servers.codexis]
command = "codexis-agent-cli"
args = ["mcp", "serve"]
In Claude Code, the equivalent .mcp.json entry is as follows.
{
  "mcpServers": {
    "codexis": {
      "type": "stdio",
      "command": "codexis-agent-cli",
      "args": ["mcp", "serve"]
    }
  }
}
The MCP process uses the stored profile of the user running it. Add --read-only and --allow-path to args as described in the MCP guide. When running as another user, prepare the profile in that user’s environment.
Check the connection and run a first task
First ask the client to check the connected account using identity_get and list projects using project_list. Then ask it to create a project, start a chat or send a message. The message_watch tool observes a specific answer; how progress updates appear depends on the client.
For HTTP 401, check the key and whether it is sent in X-Api-Key. For connection errors, check that the complete MCP URL is reachable from where the client makes its requests. If tools are missing, check that the connector is enabled for the session and allowed by your organization.
Next steps
Attachments, progress and controls through MCP · CLI · REST API v2