

Outlook for Windows
Set up a certificate and email signing in Outlook for Windows to send questions to CODEXIS AI Agent.
CODEXIS AI Agent accepts only digitally signed emails. A certificate provides the signature. These instructions are for the Outlook desktop app, not Outlook in a browser.
Where to get a certificate
- From your company. This is the most common case. Your work computer usually already has the company certificate authority certificate; you only need to upload one file to CODEXIS AI. Start with step 1.
- From a public authority, such as I.CA, eIdentity, or Certum. CODEXIS AI already trusts these authorities, so you do not need to upload anything. Start with step 4.
- You do not have one yet. Ask your IT department for a certificate, or obtain one from a public authority. Then start with step 4.
1. Find your company CA certificate
Your computer stores the company authority certificate in its list of trusted certificates.
- Press the Windows key, type
Manage computer certificates, and open the app. - On the left, open Trusted Root Certification Authorities → Certificates and find your company in the Issued To column.
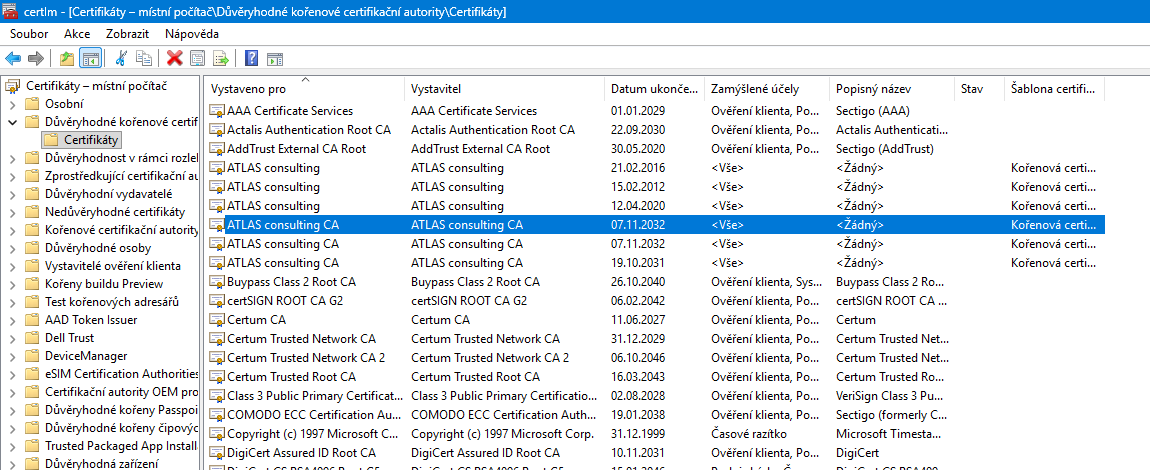
- Double-click the certificate to confirm that it belongs to the correct authority, then close the window.
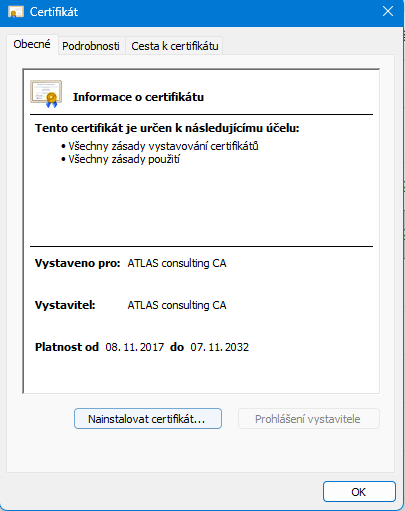
2. Export the certificate to a file
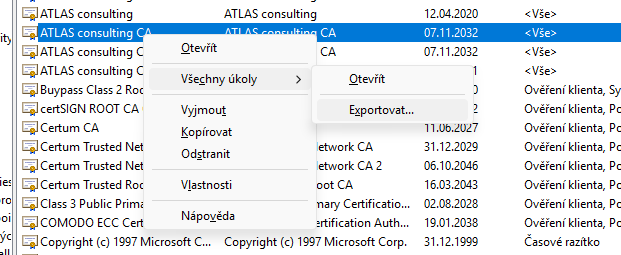
- Right-click the certificate and choose All Tasks → Export.
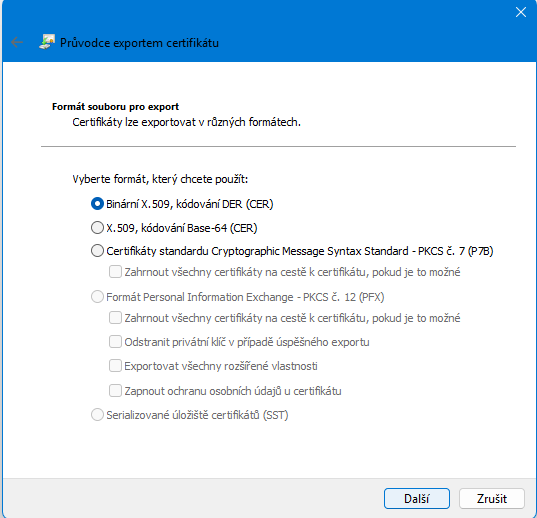
- Click Next and keep the default DER encoded binary X.509 (.CER) format.
- Click Browse, choose your Desktop, and name the file.
- Click Finish.
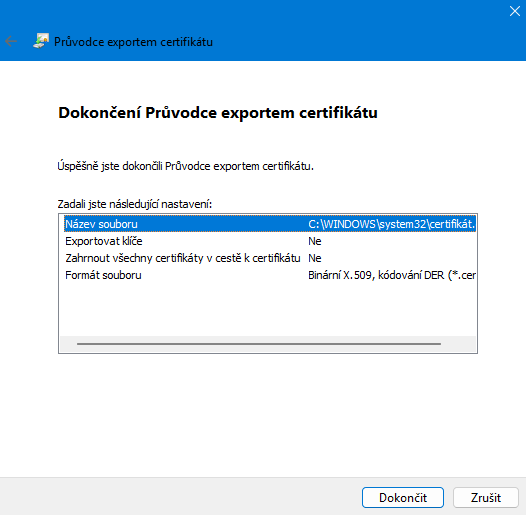
You now have a .cer file on your Desktop. Upload it to CODEXIS AI in the next step.
3. Upload the CA certificate to CODEXIS AI
- Open CODEXIS AI and click Settings.
- Go to Communication channels → Email.
- Note the address in the Agent address field. You will send your messages there.
- In Trusted authorities, click Choose file and select the file from your Desktop.
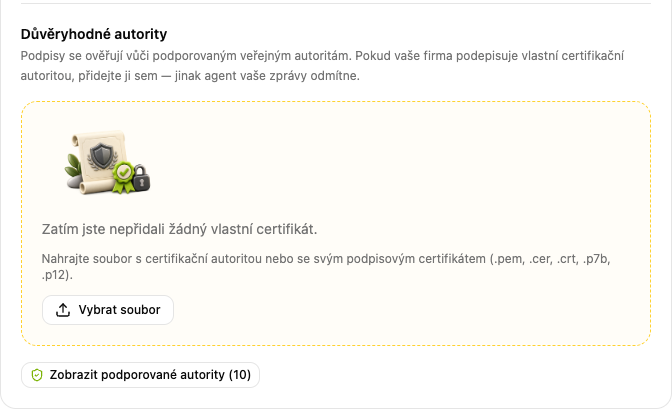
The authority appears in the list. Under Show supported authorities, you can check which authorities CODEXIS AI already trusts. If yours is listed, you do not need to upload it.
4. Turn on signing in Outlook
Use your primary Outlook account
Signing works only for the primary account. The address you use to email CODEXIS AI Agent must therefore be your primary account in Outlook.
- Open Settings in Outlook and choose Mail → S/MIME on the left.
- Select Add a digital signature to all outgoing messages.
- Select Automatically choose the best certificate for digital signing.
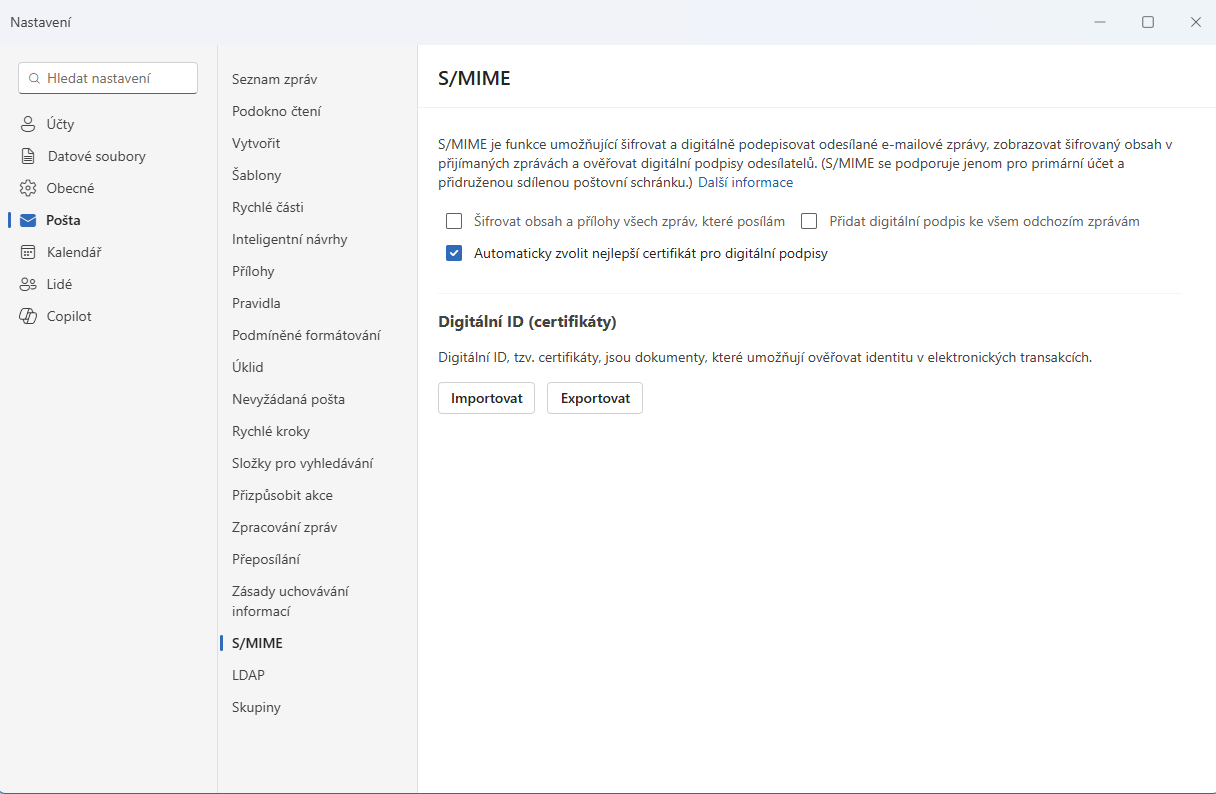
Leave Encrypt contents and attachments for all messages I send unchecked. CODEXIS AI Agent needs to read the message. Outlook will now sign your messages automatically.
If Digital IDs (Certificates) is empty, ask your IT department for a .p12 or .pfx file and its password. Click Import, select the file, and enter the password.
5. Send a signed email
- Compose a new message in Outlook to the Agent address you noted earlier.
- Enter
Connection testas the subject. - Write
Please reply to confirm the connection works.in the message. - Send the message.
A reply usually arrives within a few minutes. When it does, the integration is ready.
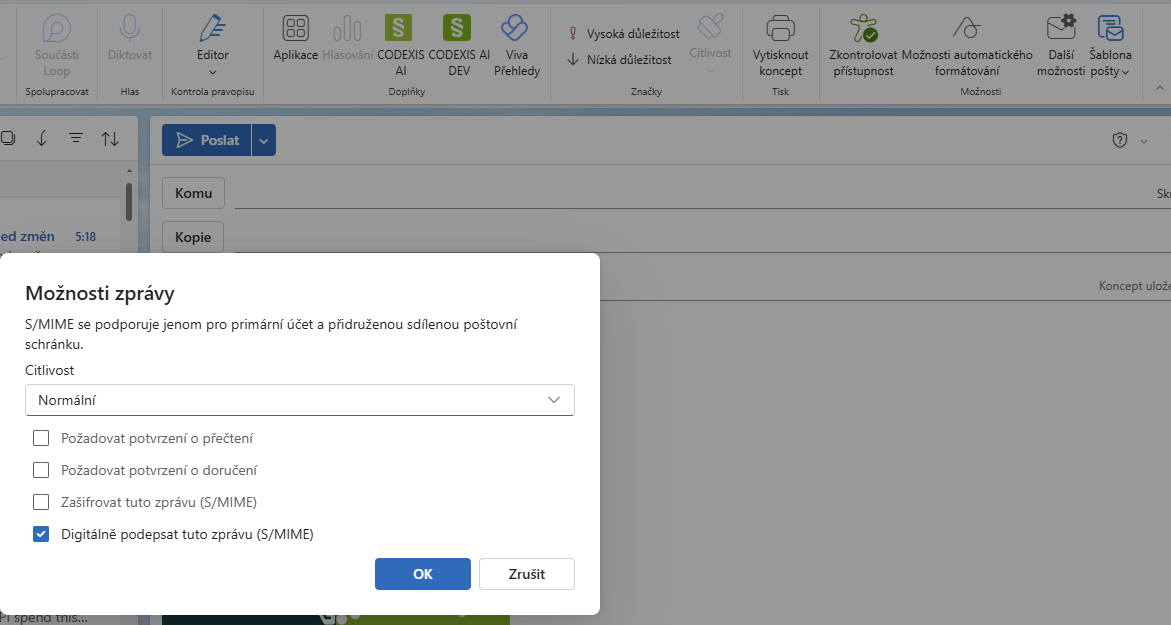
To sign just one message, open its Options tab, click More options, select Digitally sign this message (S/MIME), and confirm with OK.
If no reply arrives
First, check your Sent folder to see whether the message has a digital signature mark. Then check that the address in the certificate, the sender address, and the address of your CODEXIS AI account all match.
If the certificate does not appear in S/MIME settings, quit Outlook completely and reopen it.
If you encrypted the message by mistake, write a new one with signing enabled and encryption disabled. CODEXIS AI Agent must be able to read it.
If the signature is present, return to Settings → Communication channels → Email and check that your authority appears under Trusted authorities. If it is missing, upload it as described in step 3.
Sending more emails
You do not need to repeat the setup. See How to email CODEXIS AI Agent for attachments and follow-up replies.