6. Automation
What it is: Automation lets you schedule CODEXIS AI to perform a given task regularly on its own — for example, to check the documents in a folder every morning and alert you to any problems. You set it up once and it keeps running by itself according to the schedule.
Where to find it: In the left-hand menu Tools → Automation, then click the Create automation button.
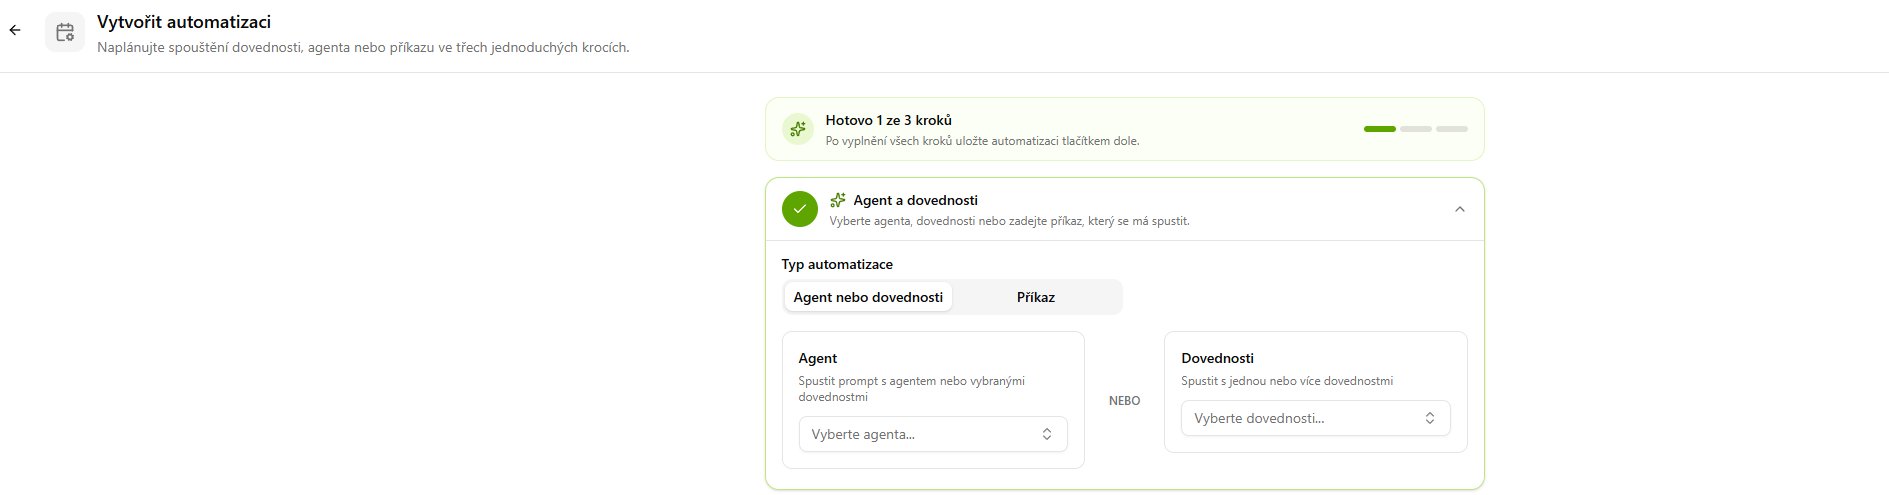
Creating an automation involves three steps (you can see your progress at the top as "X of 3 steps done").
Step 1 — Agent and skills
Here you define what should run. First, choose the Automation type:
- Agent or skills — runs a prompt with a selected agent, or with one or more skills (you pick from the Select an agent… / Select skills… menu).
- Command — instead of an agent, you enter a command directly.
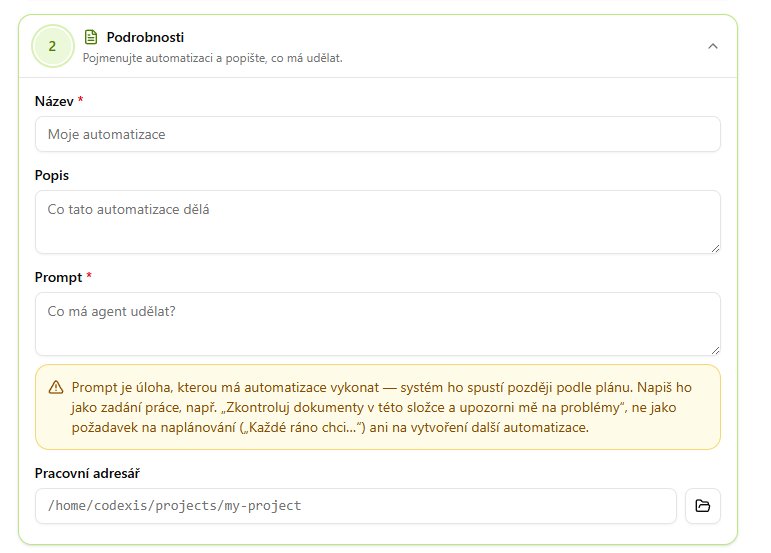
Step 2 — Details
Here you name and describe the task:
- Name (required) — what the automation will be called
- Description — an optional note about what the automation does
- Prompt (required) — the actual work assignment for the AI
- Working directory — the folder in which the agent should work
⚠️ Important note about the Prompt field: Write it as a work assignment, not as a scheduling request. Correct: "Check the documents in this folder and alert me to any problems." Wrong: "Every morning I want…" (you handle scheduling in step 3, not in the prompt).
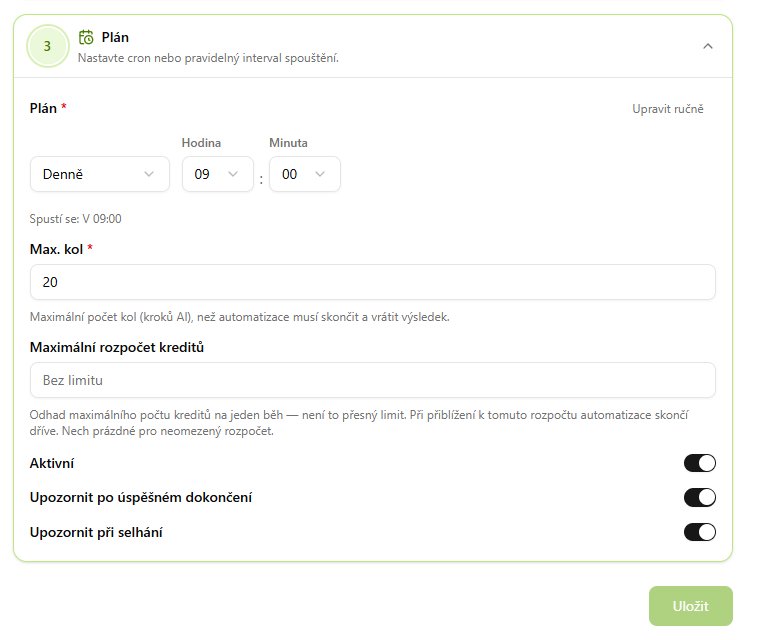
Step 3 — Schedule
Here you set when and how often the task should run:
- Schedule (required) — the interval (e.g. Daily) and a specific Hour : Minute. Below the setting, a confirmation line appears: "Will run: At 09:00". Advanced users can use Edit manually (cron).
- Max. rounds (required) — the maximum number of AI steps before the automation must finish and return a result (default 20).
- Maximum credit budget — the estimated cap of credits for a single run. As the limit approaches, the automation finishes early. If you leave it empty, the budget is unlimited.
At the bottom there are three toggles:
- Active — turns the automation on/off
- Notify on successful completion — sends you a notification when it runs successfully
- Notify on failure — alerts you when an error occurs
Finish the setup by clicking the Save button.